High-Quality Silicon Carbide Products | Advanced Ceramic Solutions
Rock Tumbler Grit Overview: Silicon Carbide Quantities Discovered .
(how much silicone carbide is needed for a rock tumbler)
Obtaining rocks polished to that ideal, gleaming finish? It’s addictive. The gratifying rumble of the tumbler, the expectancy of opening up the barrel … it’s like unwrapping a geological present. But the magic does not happen alone. You need the right tools, and silicon carbide grit is the superstar. Numerous beginners ask: “Just how much silicon carbide grit do I in fact require?” Let’s break it down, step by step.
1. What is Silicon Carbide Grit? .
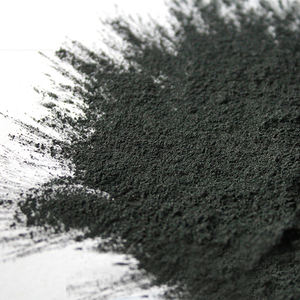
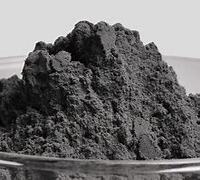
Consider silicon carbide grit as super-tough sandpaper in tiny particle kind. It’s not sand, however. It’s a manufactured product, extremely hard– more difficult than most rocks you’ll tumble. This solidity is its superpower. It grinds down harsh edges and scratches away flaws. Grit is available in various sizes, gauged in mesh. A lower number means coarser grit (like 60/90), best for hostile shaping. Greater numbers suggest finer grit (like 500 or 1200), utilized for smoothing and pre-polishing. Silicon carbide is the go-to choice for the preliminary harsh grinding stages because it cuts fast. It’s the workhorse that gets your rocks prepared for the finer brightening actions later.
2. Why Silicon Carbide Grit Issues So Much .
You can not miss excellent grit. Utilizing the incorrect kind, or even worse, the wrong amount, brings about disappointment. Rocks might not erode uniformly. They could end up wounded or cracked. The toppling time could drag out for life with poor outcomes. Silicon carbide is important due to the fact that it efficiently eliminates material. It changes rugged, dull rocks into smooth, designed charms ready for the following phases. Without adequate grit, the rocks simply rub against each other without much grinding occurring. It mishandles. Excessive grit creates a thick sludge. This sludge cushions the rocks, decreasing the grinding activity. It additionally puts extra strain on your tumbler’s motor. Obtaining the quantity right is vital for efficiency, rate, and protecting your devices.
3. Just How Much Silicon Carbide Grit Do You Required? .
This is the golden concern. Fail to remember complicated formulas. The rule of thumb is magnificently basic: Use concerning 3 tablespoons of silicon carbide grit per pound of rock. This puts on the coarse grinding phase (normally Stage 1). Procedure your rocks by weight. Place them on a kitchen scale. Got 2 pounds of rock? You require about 6 tbsps of crude silicon carbide grit (like 60/90 or 80/120 mesh). Consistency issues too. Add enough water to just cover the rocks after you add the grit. You want a slurry, not soup. Assume thick pancake batter. This slurry lugs the grit bits properly. It makes certain every rock gets combed. Inspect the barrel after a day or 2. If the slurry looks slim and watery, a little bit a lot more grit might aid. But stick near the 3 tbsp per lb guideline. It works.
4. Applications: Silicon Carbide in Action .
Silicon carbide grit isn’t just for the very first tumble. Its major job is the heavy training in Stage 1. It forms rough rocks, eliminates significant imperfections, and creates a consistent surface area. You could utilize it once again in Phase 2 (fine grinding) if your rocks are extremely tough or still unequal. Nonetheless, many tumblers switch over to a better aluminum oxide grit for Phase 2. Silicon carbide is hardly ever utilized for brightening stages (Stage 3 & 4). Those stages need much finer, gentler compounds to achieve a shine. The essential application for silicon carbide continues to be the first grinding phase. It establishes the structure. Utilizing the right amount right here makes all subsequent stages faster and a lot more successful. It’s the crucial initial step for changing rough stones right into tumbling-ready candidates.
5. Silicon Carbide Grit FAQs .
Can I recycle silicon carbide grit? Normally, no. After a week of tumbling, rugged silicon carbide grit breaks down dramatically. It sheds its sharp sides and reducing power. The particles end up being also small to do the designated job properly. Always utilize fresh grit for each coarse grinding stage for the very best results.
What happens if I use excessive grit? Way too much grit develops a thick, muddy slurry. This slurry acts like a cushion. It avoids the rocks and grit from affecting each other with adequate force. Grinding slows down dramatically. Your stemless glass motor likewise needs to work much harder to transform the hefty sludge, possibly overheating or wearing faster. Adhere to the 3 tbsp per pound regulation.
What occurs if I use too little grit? Inadequate grit implies not enough reducing bits are present. The rocks mostly scrub against each other instead of being ground by the grit. This brings about inefficient grinding, much longer rolling times, and potentially bruised or cracked rocks. They might not obtain effectively shaped.
Is silicon carbide the only grit for Stage 1? It’s the most common and effective for newbies. Some experienced stemless glass use aluminum oxide for Phase 1 on softer rocks, yet silicon carbide cuts quicker on a lot of products. For extremely acid rocks like agate or jasper, silicon carbide is generally the most effective option for preliminary grinding.
Can I use sand or various other abrasives rather? Making use of normal sand or unknown abrasives is not advised. Sand is typically quartz, which is softer than many rocks. It breaks down swiftly and does not reduce well. It can also contain pollutants that tarnish rocks. Silicon carbide is particularly engineered for rock tumbling. It offers consistent, foreseeable outcomes. Stick to appropriate rolling grit.
(how much silicone carbide is needed for a rock tumbler)
For how long should the coarse work (Phase 1) take? This differs widely. It relies on rock firmness, beginning roughness, grit size, tumbler rate, and load. Typically, anticipate 1 to 4 weeks. Examine progress weekly. Quit when rocks are equally formed without any significant pits or cracks, and surface areas feel smooth (not necessarily glossy).
RELATED POSTS

What is Manganese Dioxide MnO2 Used For?

What is Colloidal Gold?

Influences of Concrete Water Reducer on Different Kinds of Cement (2)

Advantages of clc lightweight foam concrete

Wide range of applications and properties of lithium silicate lithium concrete densifier
